Reading time: 6 minutes · Updated October 2026 · By Enzo, Dental Tech Expert
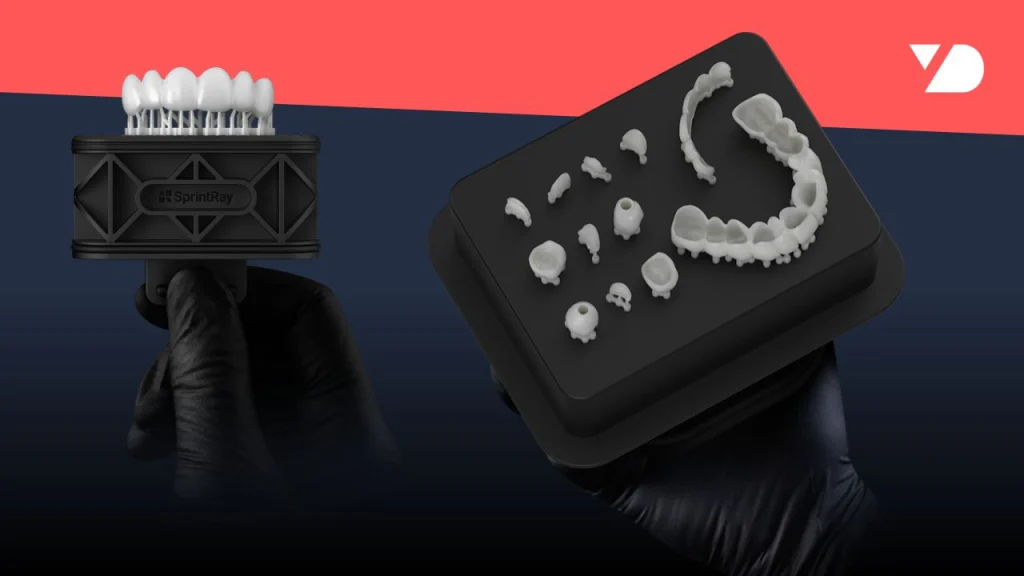
A dental 3D printer builds restorations and appliances layer by layer from liquid resin, guided by a digital design. Clinics use it to print provisional crowns and bridges, provisional full arches, bite splints, surgical guides and models in-house. In our experience it is the most common first step into in-house production.
Today, dental printing works with resins. Definitive zirconia and glass-ceramic restorations still come from a milling machine. Research into printing zirconia is moving fast, but it is not a clinic product yet.
How dental 3D printing works
A 3D printer is the opposite of a mill. A mill removes material from a solid block until the restoration is left. A printer adds material, one thin layer at a time, until the object is complete.
Most dental printers use light-cured resin. A light source, projected from below a vat of resin, cures each layer in the exact shape of that slice of the design. The build platform lifts a fraction of a millimeter, and the next layer cures on top. A full plate of parts can print at once.
A print isn’t finished when it leaves the printer. Every resin workflow has three steps:
- Print. The printer builds the parts on the platform.
- Wash. The parts are washed to remove uncured resin from the surface.
- Cure. The parts are post-cured with light (and sometimes heat) to reach their final strength and properties.
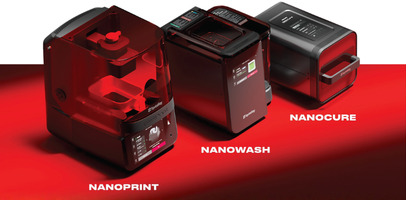
That is why printer systems are usually sold with a wash unit and a curing unit. The SprintRay line, for example, pairs each printer with a wash station and a curing unit.
What you can print in-house today
The range of what a clinic can print grows every year, mostly because resins keep improving.
| Application | Used for | Who uses it most |
|---|---|---|
| Provisional crowns and bridges | Temporaries while the definitive restoration is made | General dentists |
| Long-term provisionals | Ceramic-loaded resins that last longer in the mouth | Restorative and implant practices |
| Provisional full arches | Immediate-load All-on-X temporaries | Implant practices |
| Bite splints and night guards | Bruxism and TMD appliances | General dentists |
| Surgical guides | Guided implant placement | Implantologists and oral surgeons |
| Models | Study models, working models, aligner models | Every practice and lab |
| Dentures | Denture bases and teeth, with indicated resins | Prosthodontic and general practices |
Some chairside printers now focus on single-unit crowns. The SprintRay Midas, for example, produces crowns from resin capsules in minutes, which brings same-visit crowns into reach without a mill. Whether a printed crown can be used as definitive depends on the resin and its indication, so always check the material’s clearance for the use you plan.
Watch: milling vs 3D printing in 60 seconds
Enzo explains the one difference that decides between a printer and a mill: the materials each one can work with.
3D printer or milling machine?
They are different technologies for different jobs, and the deciding factor is material.
| 3D printer | Milling machine | |
|---|---|---|
| Process | Additive: builds layer by layer | Subtractive: carves from a block or disc |
| Materials | Resins | Zirconia, lithium disilicate, PMMA, wax, titanium |
| Best for | Provisionals, splints, guides, models, dentures | Definitive crowns, bridges, full arches, abutments |
| Parts per run | Many parts on one plate | One block, or several units per disc |
| Where it sits in the journey | Usually the first in-house machine | The step to definitive same-day work |
A complete in-house workflow eventually has both: the printer for everything provisional and the mill for everything definitive. For how mills work, read How Dental Milling Machines Work. If definitive crowns are the work you most want to bring in-house, start with our In-House Milling Buyer’s Guide instead.
Where a printer fits in your digital journey
In our six levels of digital dentistry, the printer is level 4. The practice already scans (level 2) and designs, at least simple cases (level 3). The printer is the first time production moves in-house.
That is why it’s such a common starting point. The investment is lower than a mill, the learning curve is shorter, and it pays off on things the practice already does every week: temporaries, guards and guides that used to go out to the lab.
How to apply this in your practice
- List what you send out every week that is printable. Models, night guards, surgical guides and temporaries are the usual four. That list is your first-year print queue.
- Put a number on it. Use our lab-cost calculator to see what those cases cost you today in lab fees and second appointments. No sign-up needed.
- Match the printer to the list, not the other way round. A compact system such as the SprintRay Nano covers models, guards and guides for a single practice; higher-volume systems such as the Pro 2 make sense when several providers share the queue or when full arches are routine. Watch Scanner, printer or mill: the right order to buy before deciding.
What’s next: printing zirconia
Printing ceramics has been the industry’s next frontier for years. Three problems have held it back: industrial ceramic printers that cost several times a dental mill, post-processing (debinding and sintering) that takes more than 100 hours, and a surface finish that isn’t yet good enough for aesthetic work.
A recent University of Texas study tackled the first two. Per the study, it used a printer priced like a mid-range dental printer and a resin that works out to a few dollars per crown, and with an ultra-fast thermal process it cut debinding and sintering from over 100 hours to about 30 minutes.
That is promising, especially for high-volume labs: a plate of 40 printed crowns could be ready for finishing in half an hour. But it is still research, surface finish is unsolved, and it doesn’t replace the same-day workflows clinics already have. If you need definitive zirconia today, you need a mill.
Watch Enzo’s breakdown of the study: Dental Zirconia 3D Printing? We might be getting there.
Frequently asked questions
It cures liquid resin with light, one thin layer at a time, following a digital design. The printed parts are then washed and post-cured to reach their final properties.
Provisional crowns and bridges, provisional full arches, bite splints, night guards, surgical guides, models and, with indicated resins, dentures. Some chairside printers also produce single-unit crowns.
Not in a clinic today. Zirconia printing exists in research and in industrial systems. Definitive zirconia crowns still come from a milling machine.
It depends on what you want to make. A printer covers provisionals, splints, guides and models. A mill covers definitive crowns in zirconia or E.max. Many practices start with a printer because it costs less and pays off on work they already do.
Think in systems, not printers: the printer, a wash unit, a curing unit, the resins you will actually use, and training. Entry systems for a single practice sit well below a milling workflow; high-volume lab systems cost several times more. Manufacturer pricing and promotions change quarterly, so we keep a current price guide: get it by e-mail. Final pricing is confirmed in your quote.
In practice, yes. The printer needs a digital design, and the design starts from a digital scan, either from your intraoral scanner or from your lab.
Next step
Run the lab-cost calculator to see what your printable cases cost you today, or browse the dental 3D printers we offer, including the SprintRay line. When you are ready to talk numbers, ask for the current price guide and a specialist will send it the same business day.